Creating a program example
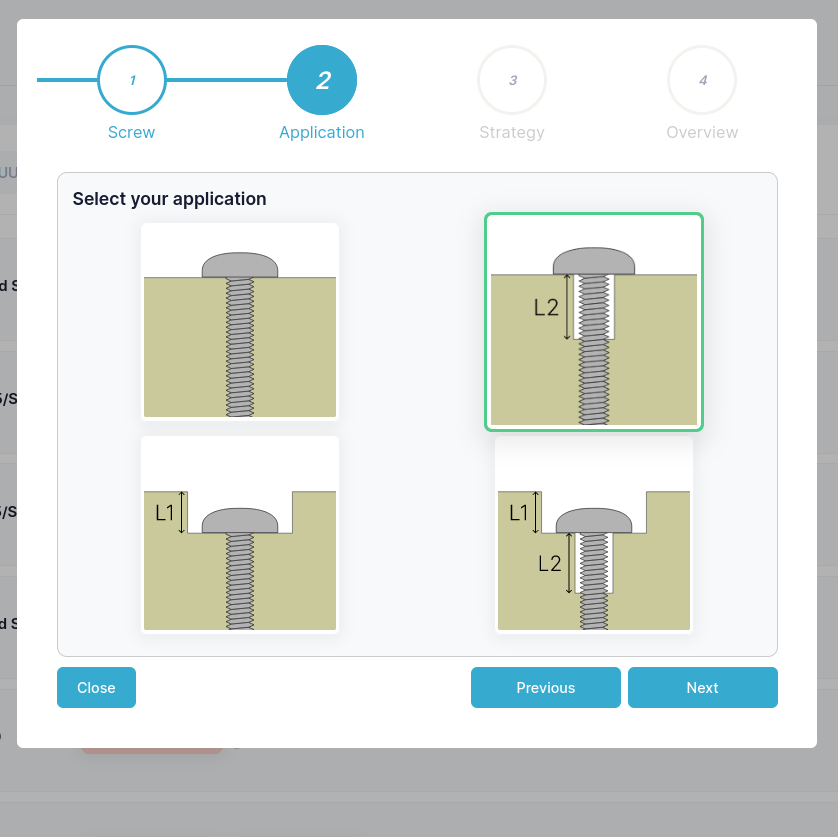
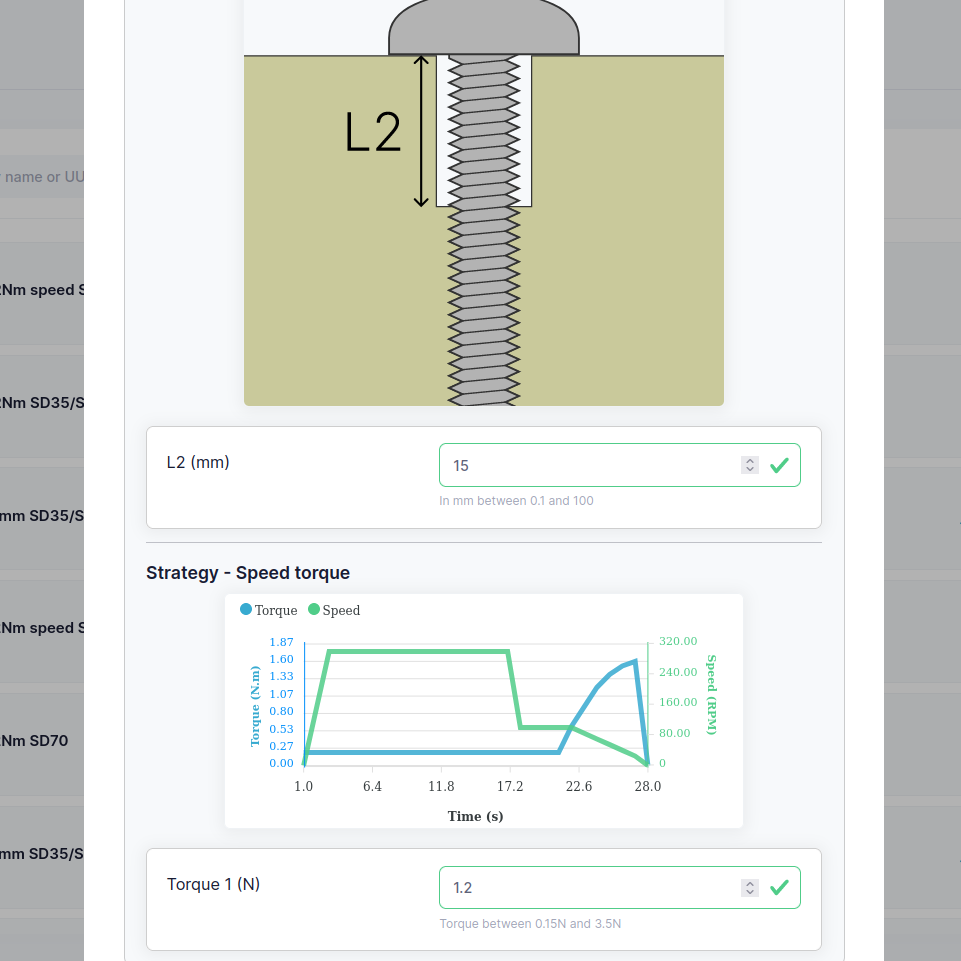
In this example we will create a screw program that inserts a M5x20mm Torx screw into a hole with no threads for the first 15 mm of the hole and then with threads for the remaining 5 mm of the hole.
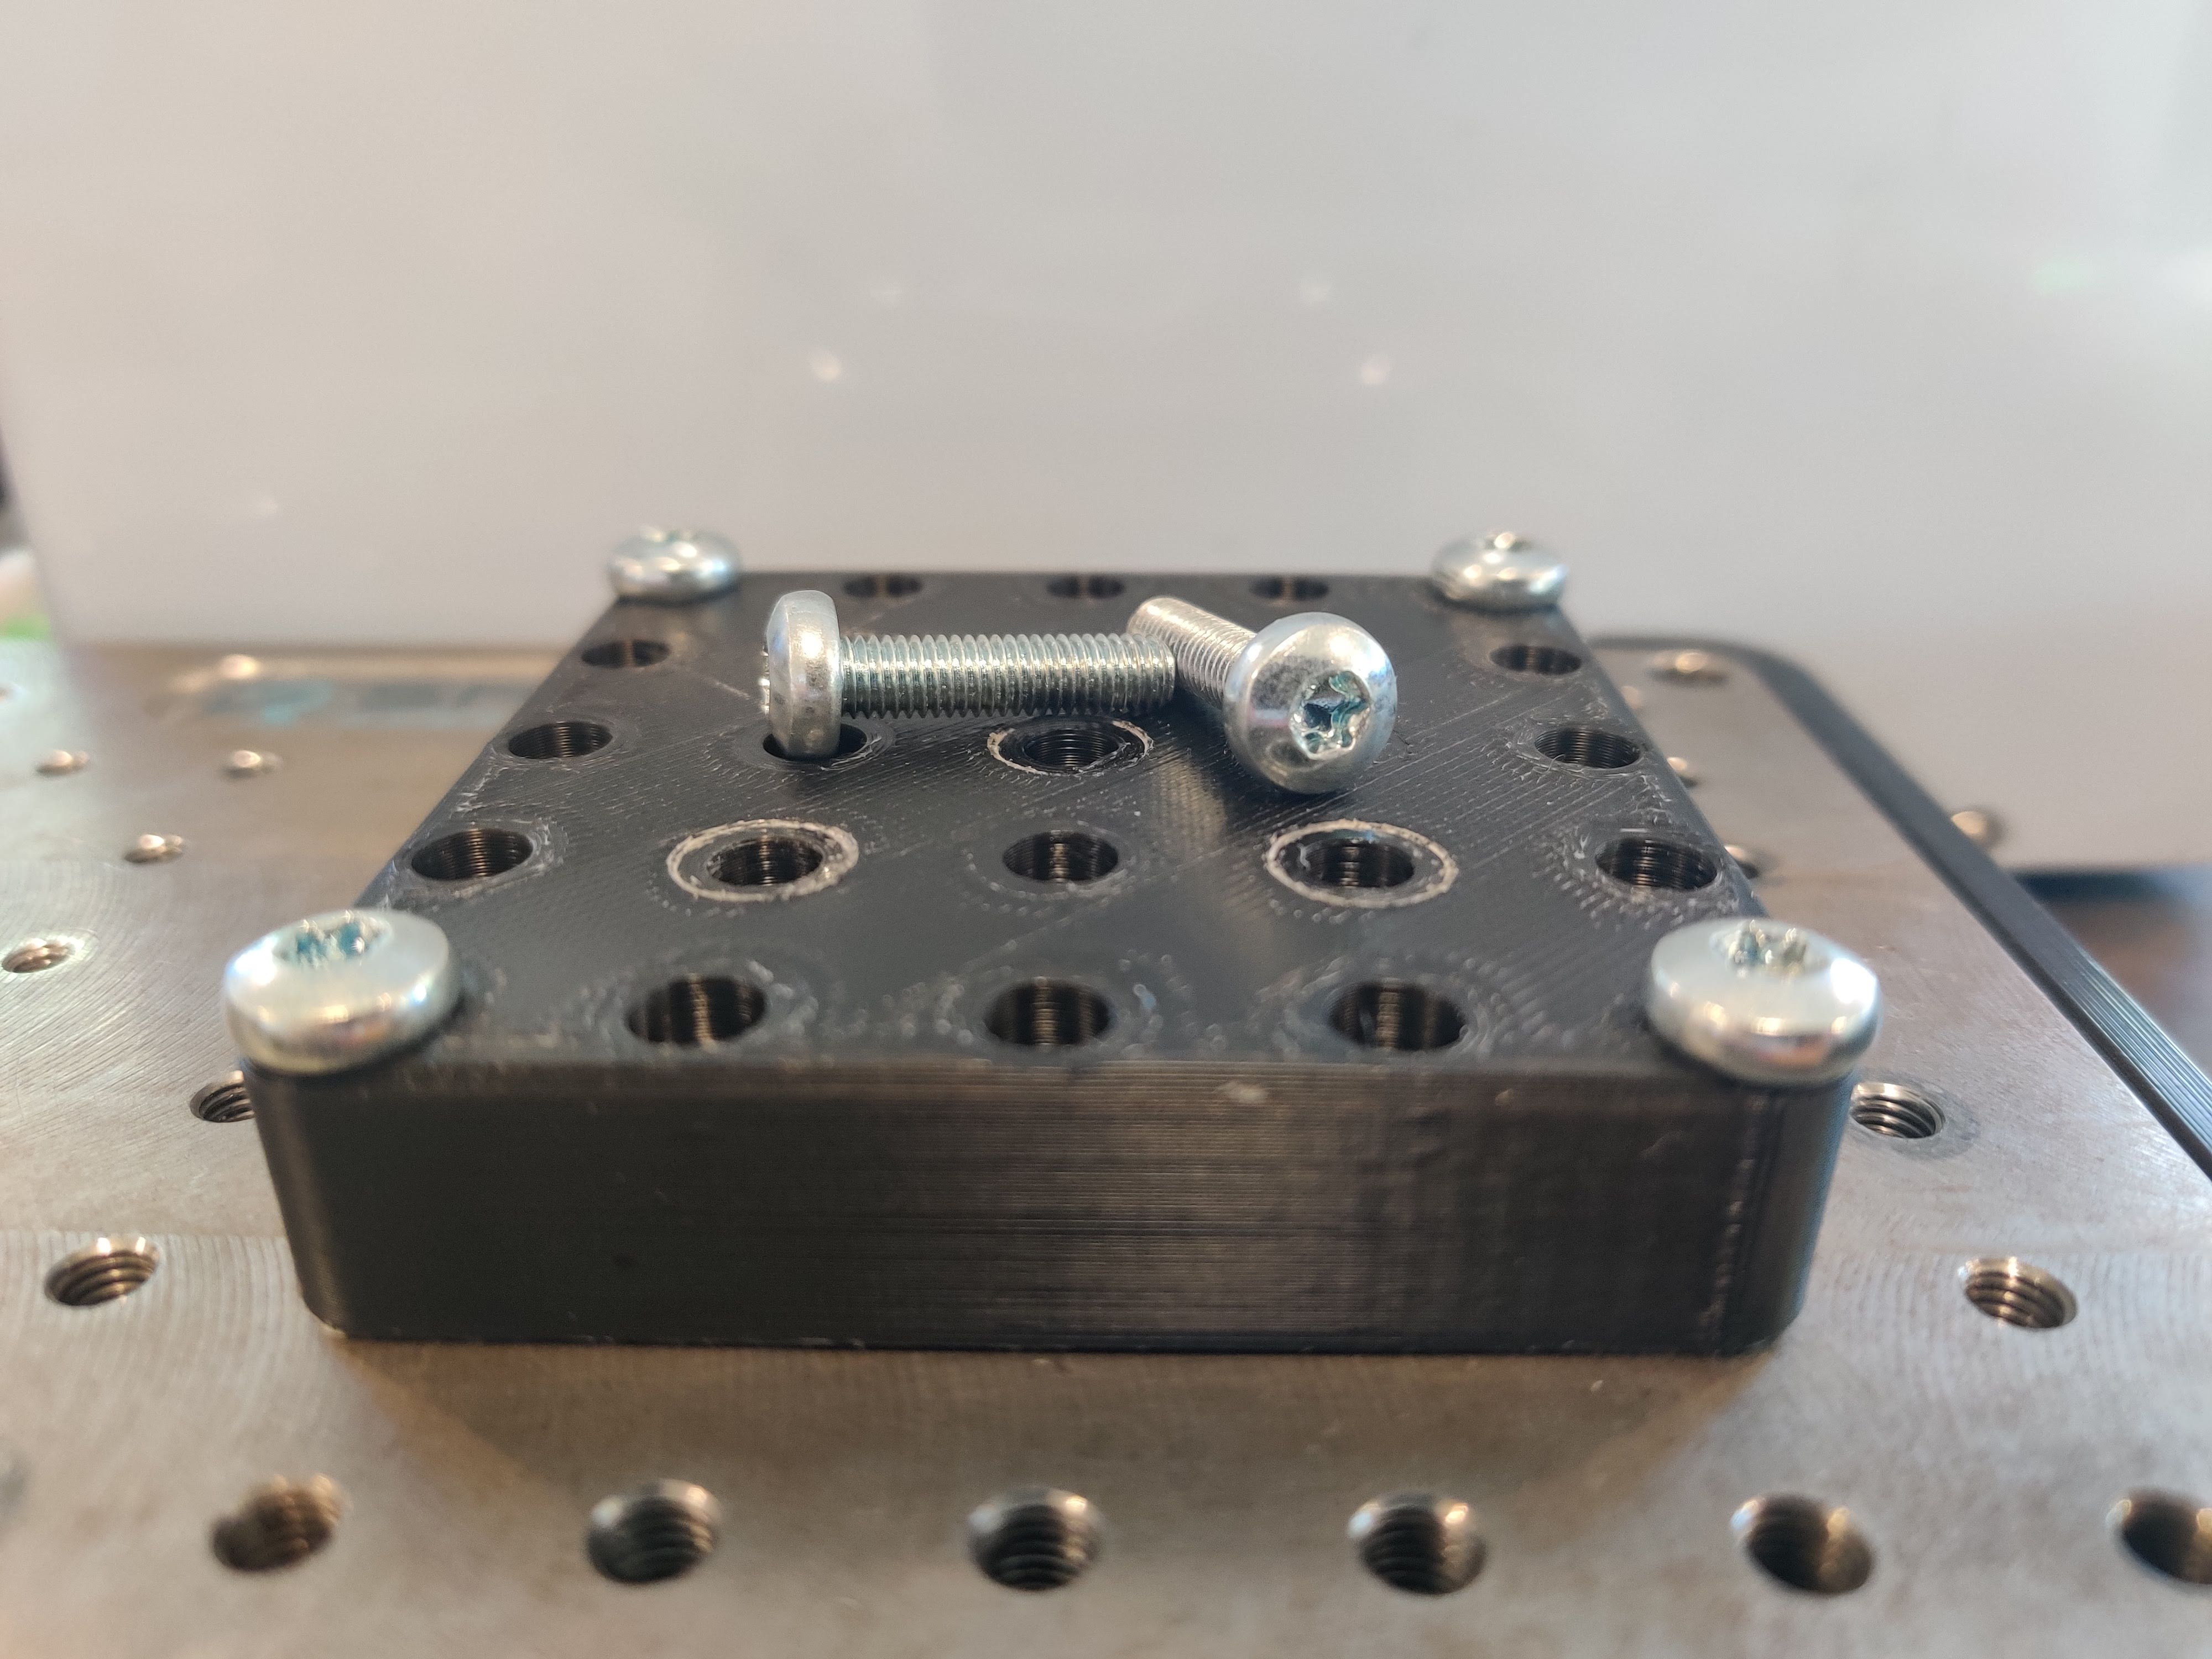
This is the screw and hole we will be using in this example.
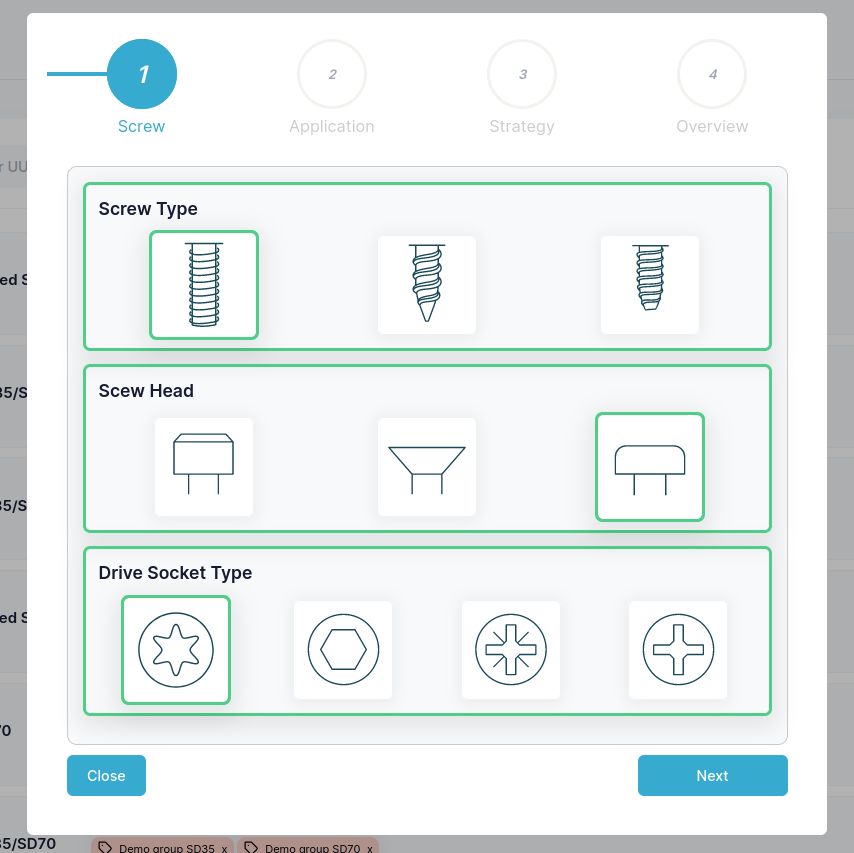
First navigate to the Programs tab and click on the Add new program button to open the screw program wizard. With the screw we have chosen we will need make the selections shown below.
Next select the Application as shown below.
Then the Strategy here I have chosen to use the Speed torque strategy for the higest tool speed while keeping accurate torque.

Finally in the Overview we give the program a name, a tool speed and screw details
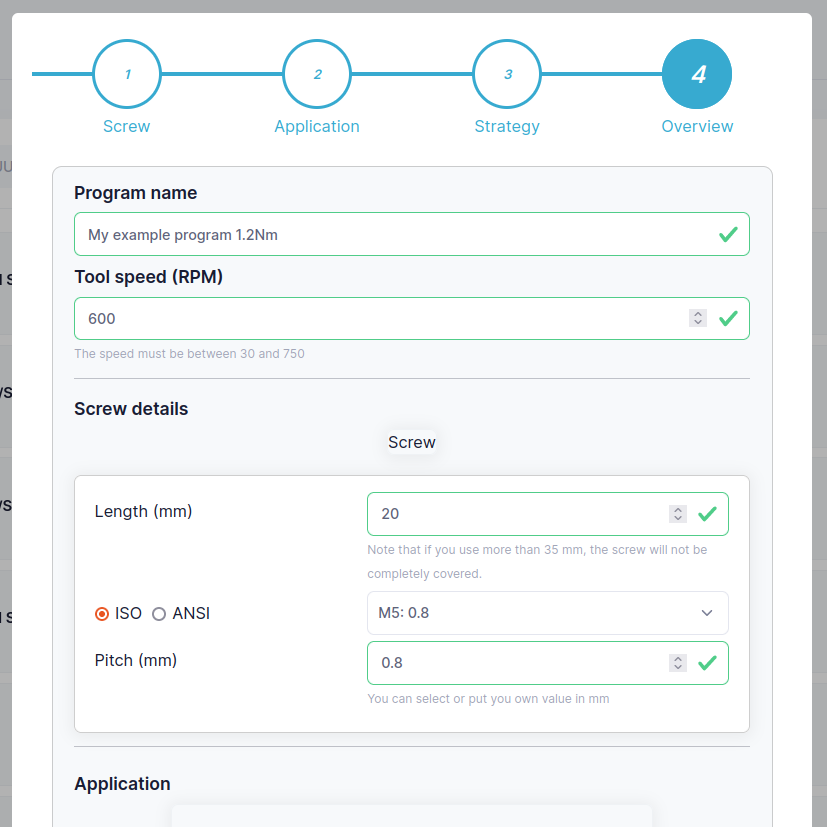
Input Application and Strategy details.
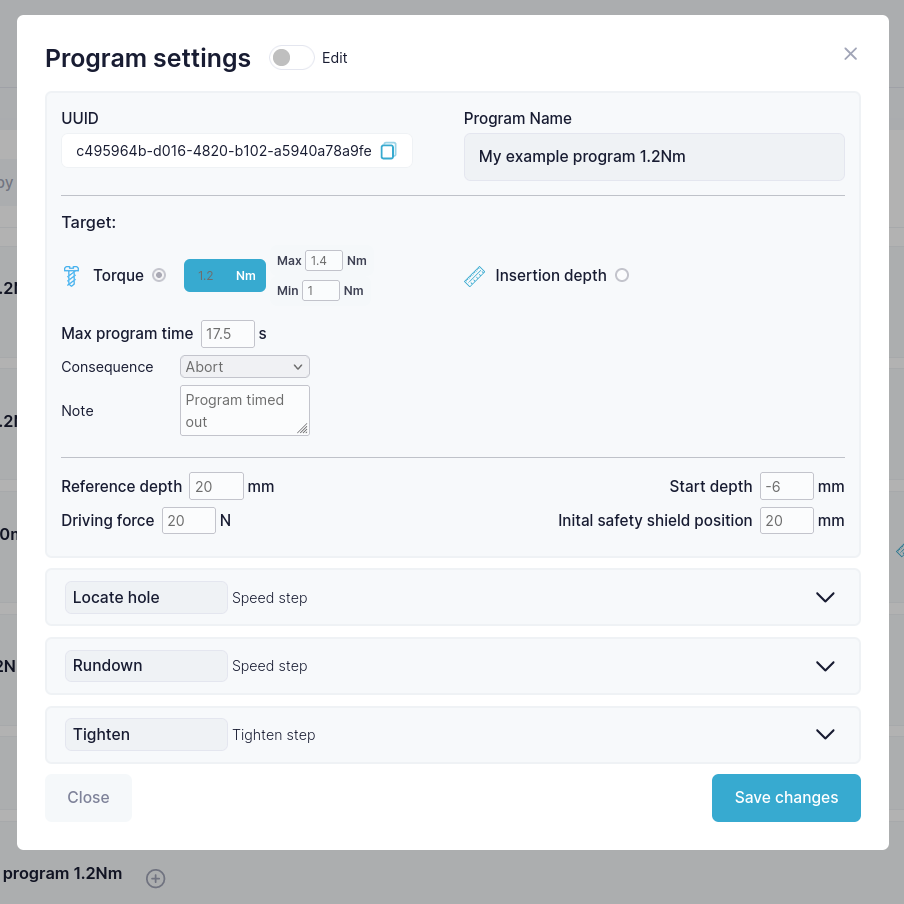
Then click on the Confirm button to create the program. When you click to edit the program you will see the following:
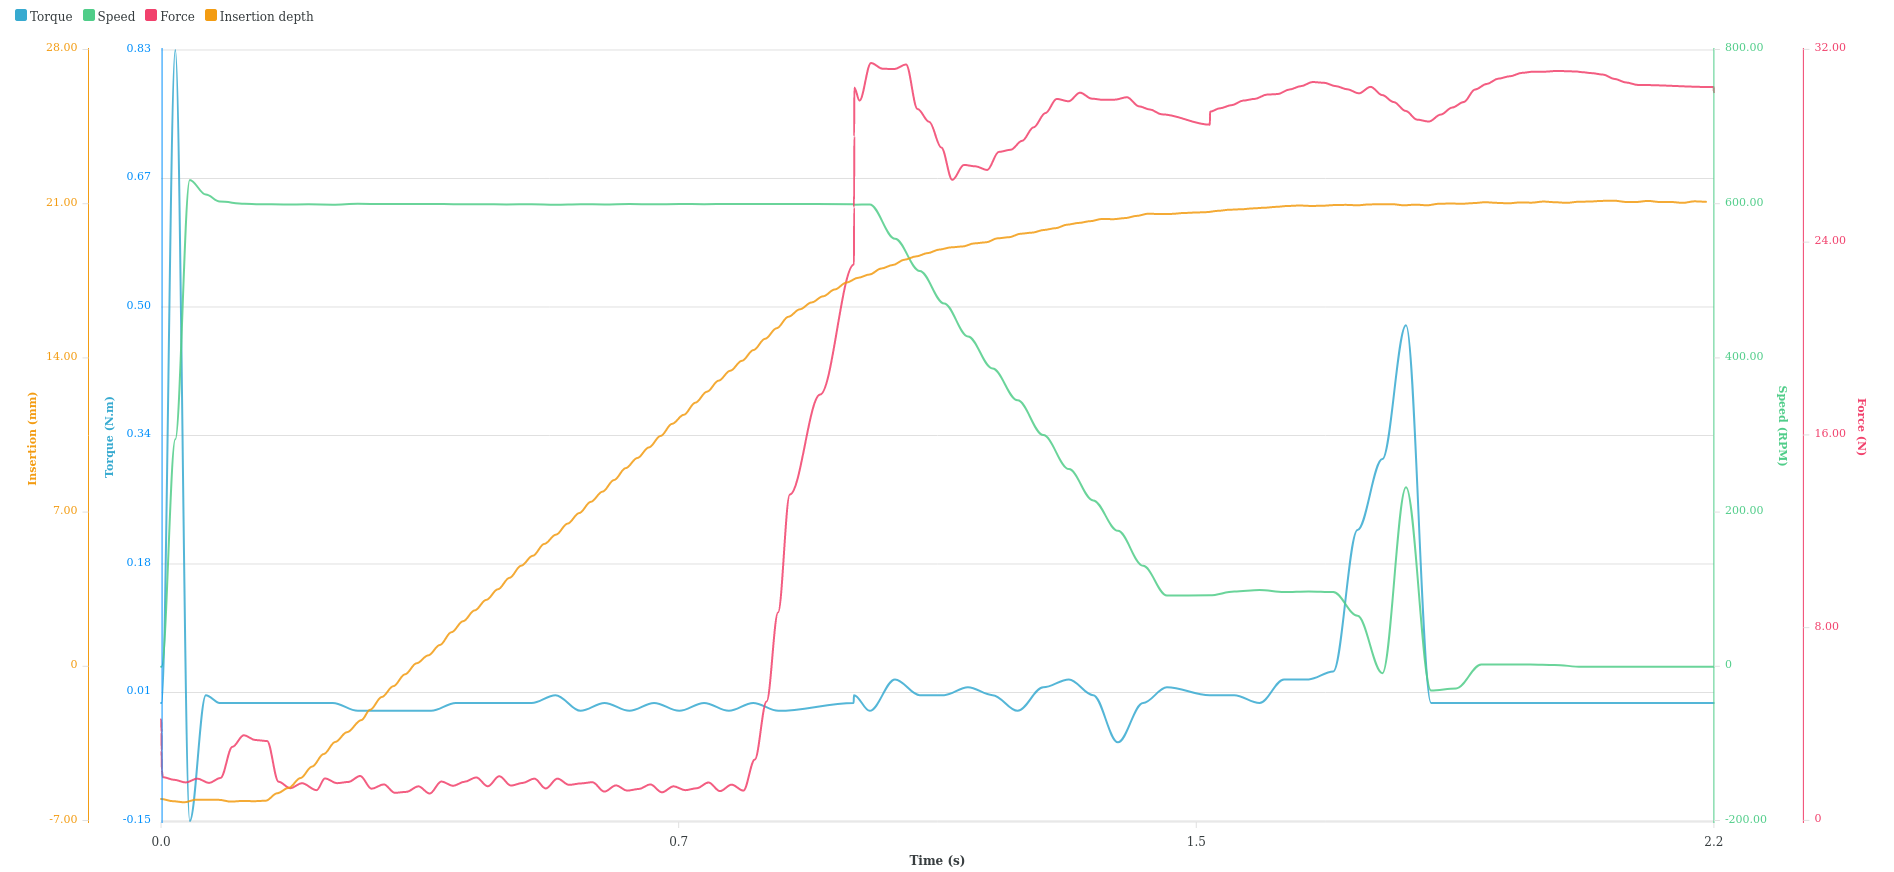
And this is a result from the program as we created it:
Having created your program you may find that you wish to make some small changes. To do this look to Understanding Programs.