Network Setup
This section covers the setup of the network connections of the SpinBridge. The network is setup on the Settings/Network tab of the Dashboard.
Basic network setup example
Connecting the robot
Kassow Robots and Universal Robots needs an ethernet connection to the SpinBridge. The recommended way to achieve this is to connect the SpinBridge to the robot directly using an ethernet cable from the 2 Robot port on the SpinBridge to the robot. You can use the default static network setup of this port and not do any further configuration on the Dashboard. Please refer to the manual of your robot integration on how to set up network on the robot. See Other Manuals. And please refer to 2 Robot for more information on the 2 Robot port.
Connecting your PC to the SpinBridge
It is recommended to set up a wired connection. Follow these steps to set up a direct connection between your SpinBridge and your PC using an Ethernet cable:
Complete the First time setup to connect to the Dashboard via the SpinBridge’s wifi hotspot.
Navigate to Settings > Network and select the 1. Ext. Network tab.
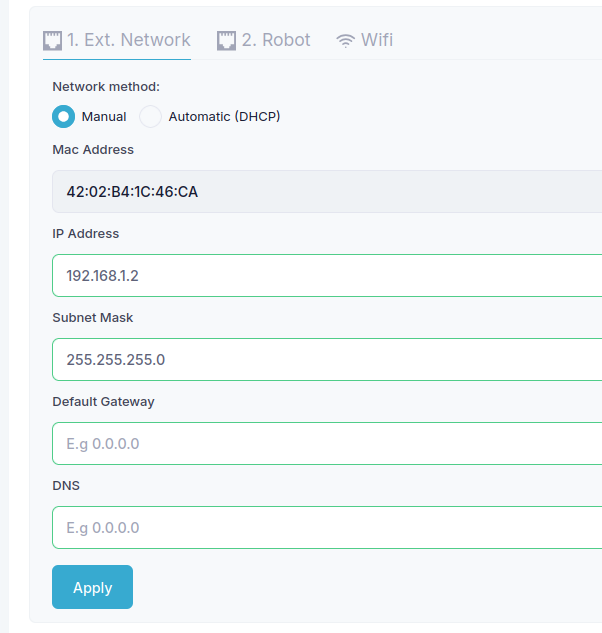
Select Network method: Manual
Enter an IP address and subnet mask. For example set the IP address to 192.168.1.2, and the subnet mask to 255.255.255.0. Leave the gateway and DNS fields empty.
Click Apply.
On your PC, set a static IP address in the same subnet as the SpinBridge. For example, set your PC’s IP address to 192.168.1.3. And a subnet mask of 255.255.255.0.
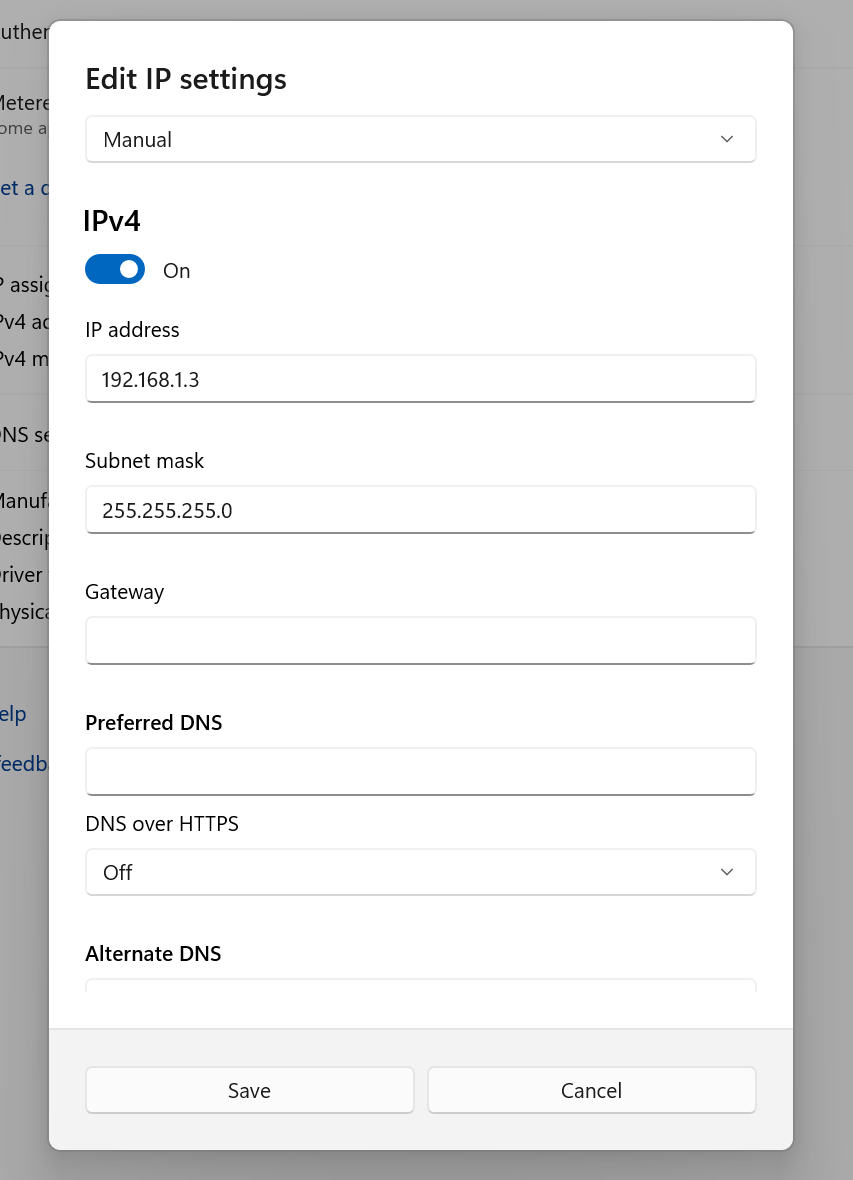
Save the settings.
Connect the SpinBridge to your PC to the 1. Ext. Network port using an Ethernet cable.
Open a browser and navigate to the IP address you assigned the SpinBridge. For example, in the above setup, go to http://192.168.1.2.
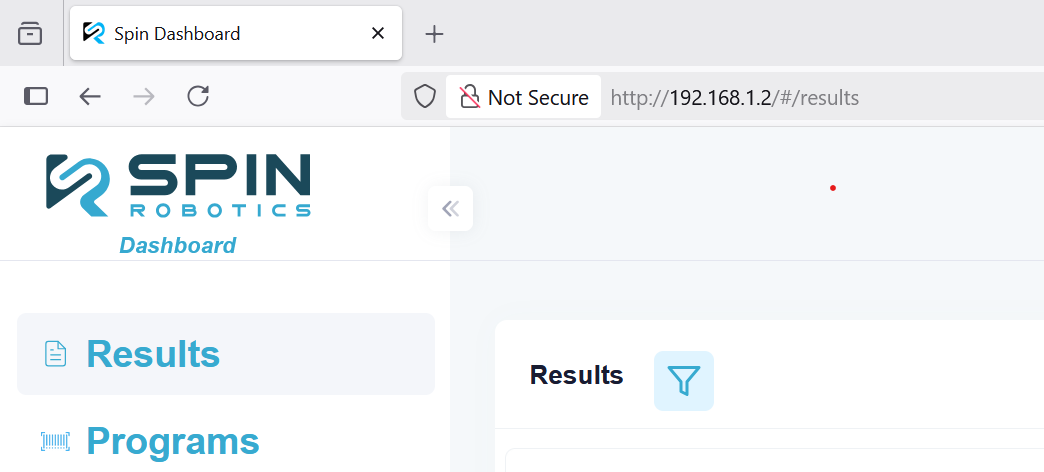
You may now close the connection to the SpinBridge’s wifi hotspot, as you will now be connected via Ethernet.
Other network configurations
Networking on the The SpinBridge can be configured in a number of different ways to suit your needs. The SpinBridge has 3 network interfaces that can be configured independently. The 1 Ext. network port is the external network interface and is normally used to connect the SpinBridge to your local network/internet. The 2 Robot port’s is intended to connect the SpinBridge to the robot. The wireless network can be either setup as an access point or connect to your local wireless network.
Warning
Keep in mind that if you change the network configuration that you are using to connect to the Dashboard you may need to reconnect to the SpinBridge and refresh the page.
1 Ext. network
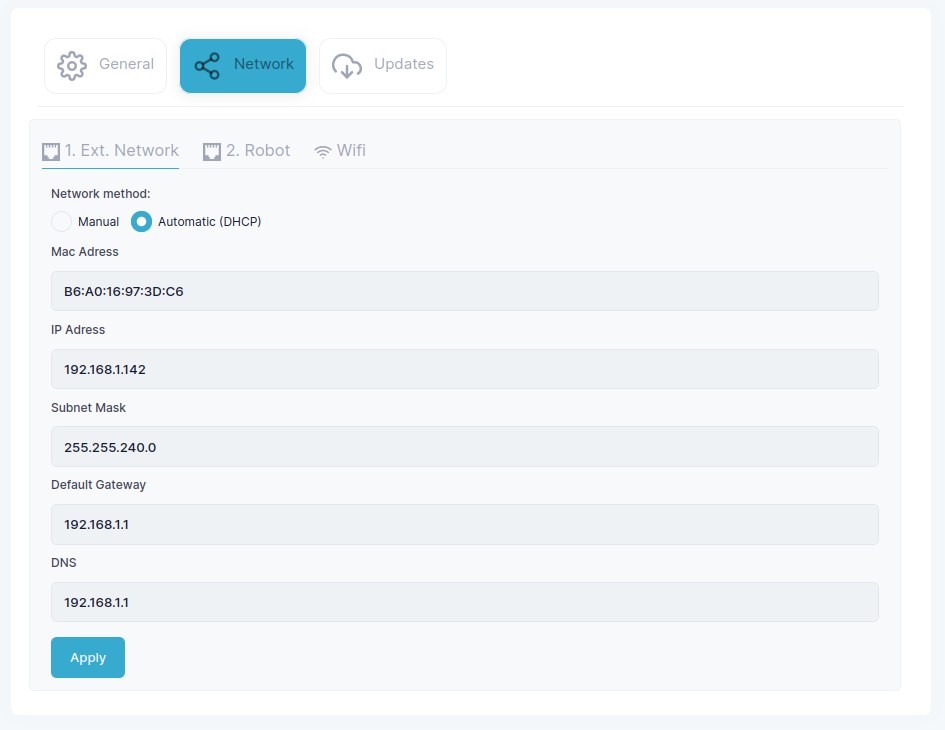
Automatic (DHCP) is the default configuration of the 1 Ext. network port.
The 1 Ext. network port is the external network interface and is normally used to connect the SpinBridge to your local network/internet. The default configuration of this port is to use DHCP to get an IP address from your local network. If you want to use this option you should choose Automatic (DHCP) and press Apply. If you want to use a static IP address you should choose Manual and enter the IP address and the Subnet Mask of your network. Default Gateway and DNS are optional but required if you want to connect to the internet and update the SpinBridge. Then press Apply.
2 Robot
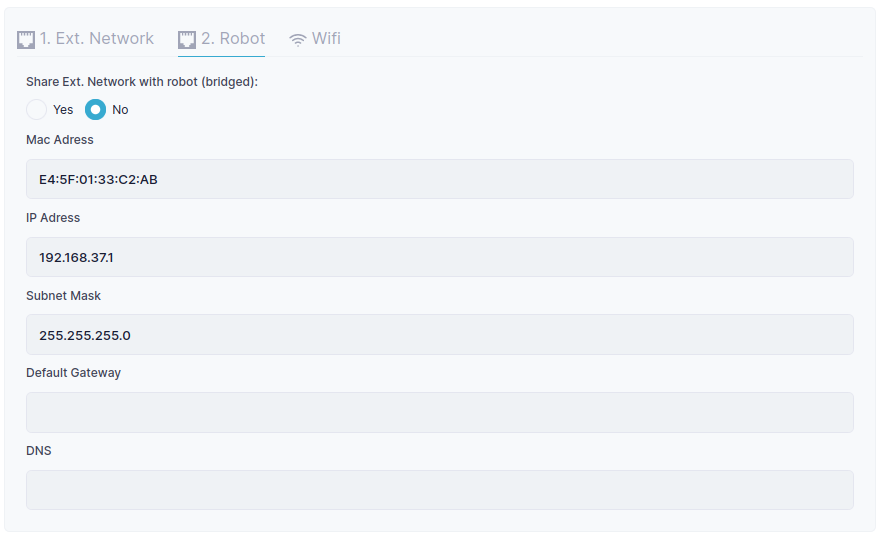
The default setting is not to share the connection of the 1 Ext. network port with the 2 Robot port. The IP address, subnet mask, etc. of the 2 Robot port cannot be configured, but you can view the details of the connection here to be able to setup the robot.
The 2 Robot port is intended to connect the SpinBridge to the robot. The default configuration of this port is to use a static IP address. The IP Address is 192.168.37.1 and cannot be changed. The Subnet Mask is 255.255.255.0.
The other option is to share the connection of the 1 Ext network with the 2 Robot port. This way the SpinBridge acts in the same way as a network switch and if e.g. you connect a robot to the 2 Robot and put the 1 Ext. network port in automatic mode and connect it to your local network, the robot will be assigned an IP address from your local network. To enable this option you should select Yes and press Apply.
Wireless
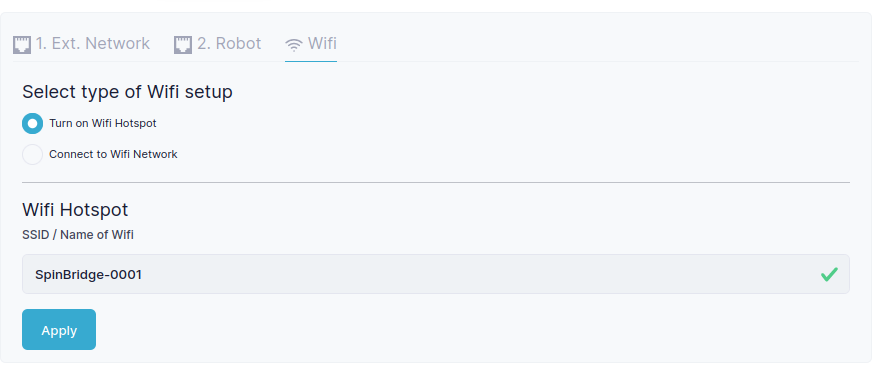
The default setting is to use the SpinBridge as an access point.
The wireless network can be either setup as an access point or connect to your local wireless network. The default setting is to use the SpinBridge as an access point. This is useful if you want to connect to the SpinBridge directly from your computer and access the Dashboard. To enable this option you should select Turn on Wifi Hotspot and press Apply. You can then connect to the SpinBridge using the SSID shown and the password spinbridge. The IP address of the SpinBridge is 10.42.0.1 when you are connected using the access point.
The other option is to connect the SpinBridge to your local wireless network. To enable this option you should select Connect to Wifi Network and press Apply. You must then enter the SSID of the wifi you want to connect to and enter the password. The IP address of the SpinBridge is assigned by your local network. This option is useful if you want to connect the SpinBridge to the internet to update the software.
Warning
Due to network latency it is not recommended connect the SpinBridge to the robot via wifi.
MAC Addresses
You can view the MAC addresses of the network interfaces on each tab. Some local networks require you to register the MAC address of the device you are connecting to the network. You can use the MAC addresses shown here to register the SpinBridge on your local network.
Note
Since the MAC addresses are software assigned they may change if you update the software on the SpinBridge.
Reset network
if problems occur with the network configuration you can reset the network configuration to the default settings with the factory reset button described here: Factory reset info.