Teaching a Position
The SD/SDV-Series system includes a Teach Pointer that enables manual teaching of screw positions directly on the workpiece.
This method ensures accurate alignment between the tool and the screw insertion point.
Teaching Principle
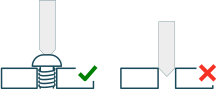
To achieve correct positioning, the screw must first be placed in its final assembled position in the product.
The Teach Pointer is then used to locate the exact screw position by engaging directly with the screw head.
Note
Do NOT teach positions on an empty hole. Always assemble the screw manually before teaching the position. This ensures correct depth, alignment, and repeatability.
Teaching Procedure
Insert the Teach Pointer into the SD/SDV-Series tool
Manually insert the screw into the workpiece in its final position
Set the robot to manual guidance mode (e.g., freedrive or equivalent)
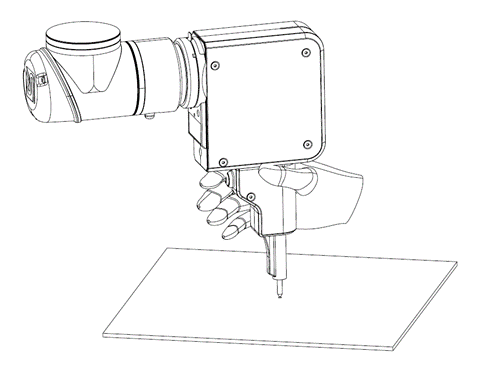
Guide the tool so the Teach Pointer engages with the screw head
Align the tool perpendicular to the surface (along the screw axis)
Record the robot position
Hint
Accurate alignment of the tool with the screw axis is critical for stable and repeatable screwdriving.
Implementation
The method for enabling manual guidance mode and recording positions depends on the control method used:
Robot-integrated software (e.g., robot apps): Teaching functions are typically handled directly through the robot interface
I/O control: Manual guidance mode can be activated by assigning a Spin Bridge output to a robot input, allowing the robot to enter freedrive or kinetic teaching mode when the rear freedrive button is pressed
The behavior of the rear freedrive button depends on the system configuration and how I/O signals are mapped.
In addition, the bit release function can be controlled via I/O:
The bit release function can be assigned to a Spin Bridge input
This allows the robot or external system to trigger bit release
Configuration of I/O functions, including bit release, is described in Dashboard. Refer to the robot manufacturer’s own documentation for enabling manual guidance (freedrive), recording positions, and tool alignment and orientation.